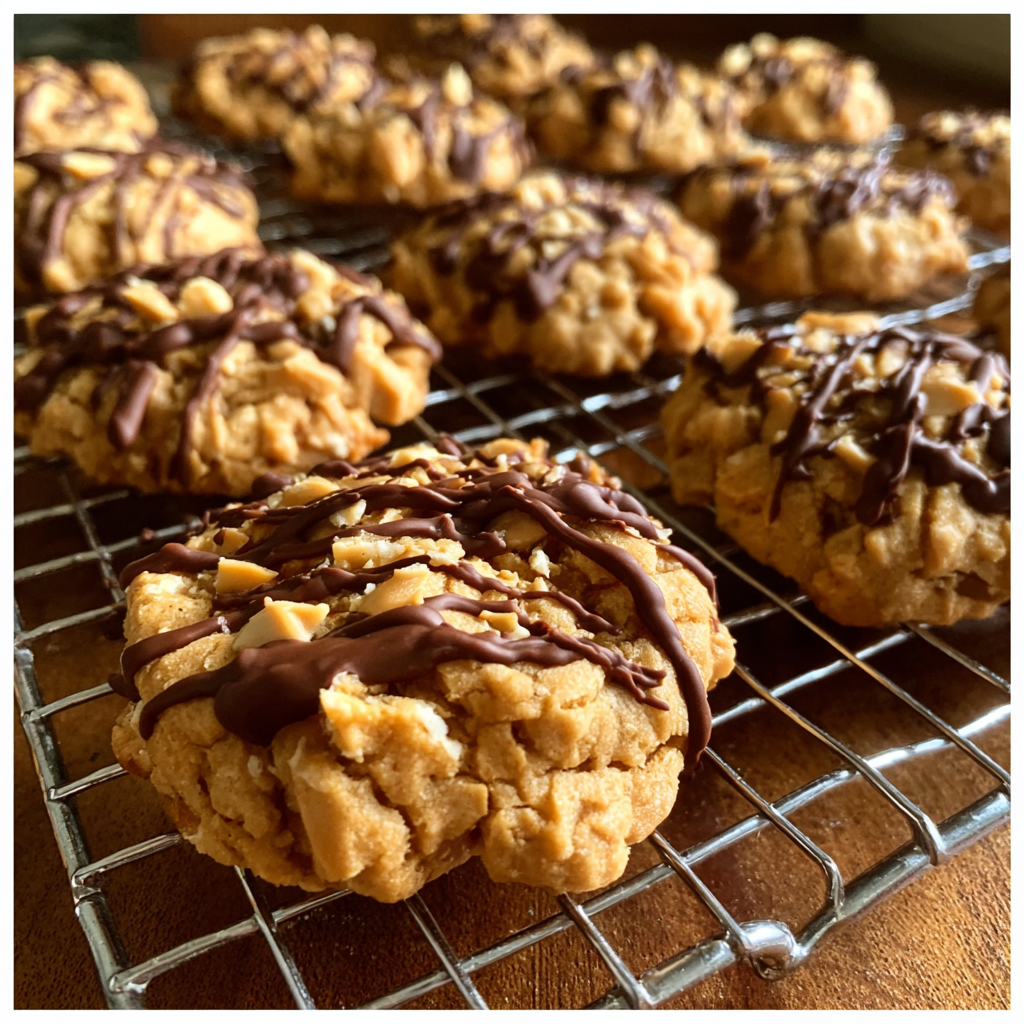
When I think about my grandmother’s kitchen, the sweet aroma of Vintage Peanut Butter No Bake Cookies always comes to mind first. These timeless treats have been gracing American kitchens since the 1960s, bringing families together with their irresistible combination of creamy peanut butter, hearty oats, and that distinctive chewy texture that melts in your mouth. There’s something absolutely magical about a recipe that requires no oven time yet delivers such incredible satisfaction – and these Vintage Peanut Butter No Bake Cookies do exactly that.
The Story Behind Vintage Peanut Butter No Bake Cookies
During the post-war era of American cooking, home bakers were discovering creative ways to make delicious desserts without heating up their kitchens during hot summer months. These no-bake cookies became an instant sensation because they combined pantry staples into something extraordinary. The beauty of Vintage Peanut Butter No Bake Cookies lies in their simplicity – just seven ingredients transform into cookies that taste like they took hours to perfect.
What makes these cookies truly “vintage” is their unchanged formula that has been passed down through generations. Unlike modern variations that often include coconut, chocolate chips, or other additions, this classic recipe stays true to its roots with the perfect balance of peanut butter richness and oat texture that made it famous decades ago.
Why Vintage Peanut Butter No Bake Cookies Are Still Popular Today
In our fast-paced world, the appeal of a dessert that comes together in just 15 minutes cannot be overstated. Vintage Peanut Butter No Bake Cookies offer busy families the opportunity to create homemade treats without the commitment of traditional baking. They’re perfect for last-minute bake sales, unexpected guests, or when you’re craving something sweet but don’t want to turn on the oven.
Moreover, these cookies are incredibly forgiving. Even novice bakers can achieve perfect results because there’s no worry about overbaking, underbaking, or complicated techniques. The stovetop method is straightforward, and the visual cues are easy to follow, making this recipe accessible to bakers of all skill levels.
Essential Ingredients for Perfect Results
The Core Components
Quick-Cook Oats (3 cups): The foundation of these cookies, quick-cook oats provide the characteristic chewy texture. Don’t substitute with old-fashioned oats, as they won’t soften properly during the brief cooking process.
Granulated Sugar (2 cups): This creates the candy-like base that binds everything together. The sugar dissolves completely during cooking, creating a smooth, glossy mixture.
Whole Milk (½ cup): Whole milk provides the right amount of fat and moisture. While you can use 2% milk in a pinch, whole milk creates the creamiest results.
Butter (½ cup): Real butter adds richness and helps create the proper consistency. Margarine can be substituted, but butter delivers superior flavor.
Creamy Peanut Butter (1 cup): The star ingredient! Use a commercial brand like Jif or Skippy rather than natural peanut butter, which can cause texture issues due to oil separation.
Pure Vanilla Extract (2 teaspoons): This enhances all the other flavors and adds that classic cookie taste.
Salt (¼ teaspoon): A small but crucial ingredient that balances the sweetness and enhances the peanut butter flavor.
Quality Matters
The success of Vintage Peanut Butter No Bake Cookies depends heavily on ingredient quality. Fresh vanilla extract makes a noticeable difference compared to imitation vanilla. Similarly, using name-brand peanut butter ensures consistent results because the oil content and texture are standardized.
Equipment You’ll Need
- Heavy-bottomed saucepan (essential for even heat distribution)
- Wooden spoon for stirring
- Measuring cups and spoons
- Wax paper or parchment paper
- Cookie scoop or large spoon for dropping
- Timer
Step-by-Step Instructions
Preparation Phase
- Set up your workspace: Lay out large sheets of wax paper on your countertops or large baking sheets. You’ll need enough space for about 36 cookies, so prepare accordingly.
- Measure ingredients: Have all your ingredients measured and ready before you start cooking. This recipe moves quickly once you begin, so preparation is key.
The Cooking Process
- Combine the base: In your heavy-bottomed saucepan, combine the sugar, milk, and butter. The heavy bottom prevents hot spots that could cause the mixture to burn.
- Bring to a rolling boil: Place the saucepan over medium-high heat and stir constantly until the mixture comes to a full, rolling boil. This should take about 3-4 minutes. A rolling boil means large bubbles that don’t stop when you stir.
- Time the boil: Once you achieve a rolling boil, continue boiling for exactly 90 seconds while stirring constantly. This timing is crucial – too little and the cookies won’t set properly; too much and they’ll become hard and crumbly.
- Remove from heat: After exactly 90 seconds, remove the saucepan from heat immediately. The mixture should look glossy and slightly thickened.
- Add peanut butter and vanilla: Quickly stir in the peanut butter, vanilla, and salt. Mix vigorously until the peanut butter is completely melted and incorporated. The mixture should be smooth and glossy.
- Fold in oats: Add the quick-cook oats and stir thoroughly until every oat is coated with the peanut butter mixture. Work quickly but thoroughly – you want even distribution.
Forming the Cookies
- Work fast: Using a cookie scoop or large spoon, quickly drop rounded portions of the mixture onto the prepared wax paper. Aim for about 2 tablespoons per cookie.
- Shape while warm: If desired, you can gently shape the cookies with the back of a spoon while they’re still warm and pliable.
- Allow to set: Let the cookies cool at room temperature for about 30 minutes until they’re completely set and no longer sticky to the touch.
Troubleshooting Common Issues
Cookies Won’t Set
If your Vintage Peanut Butter No Bake Cookies remain soft and sticky after cooling, the most likely cause is undercooking the sugar mixture. The full rolling boil for 90 seconds is essential for proper setting. Unfortunately, you can’t re-cook them once the oats are added, but you can still enjoy them as a delicious “cookie spread” over ice cream!
Cookies Are Too Hard
Overcooking the sugar mixture leads to hard, crumbly cookies. If this happens, try adding a tablespoon of milk to the mixture before adding the oats. In the future, watch your timing carefully and remove from heat at exactly 90 seconds.
Cookies Are Grainy
Grainy texture usually results from the sugar not dissolving completely. Make sure you’re stirring constantly during the cooking process and using a heavy-bottomed pan for even heat distribution.
Storage and Serving Tips
Proper Storage
Store your Vintage Peanut Butter No Bake Cookies in an airtight container at room temperature for up to one week. Layer them between sheets of wax paper to prevent sticking. In humid weather, you might want to refrigerate them to maintain their texture.
Serving Suggestions
These cookies are delicious on their own, but they also pair wonderfully with:
- Cold milk for dipping
- Vanilla ice cream as a cookie topping
- Coffee or tea for an afternoon treat
- Packed in lunch boxes for a sweet surprise
Seasonal Variations and Adaptations
While the classic recipe is perfect as-is, you can create subtle variations throughout the year:
Holiday Version: Add a teaspoon of cinnamon for warmth during winter months.
Summer Twist: Fold in a handful of mini chocolate chips after adding the oats for extra indulgence.
Nutty Variation: Replace ½ cup of oats with chopped peanuts for extra crunch.
Coconut Lovers: Add ½ cup of shredded coconut along with the oats for tropical flair.
A Personal Memory from Amelia
The first time I attempted Vintage Peanut Butter No Bake Cookies, I was twelve years old and determined to surprise my mother with homemade treats. What I didn’t realize was how important timing would be! My first batch turned into a delicious but unscoop-able mess because I got distracted and didn’t boil the mixture long enough. My grandmother, ever patient, showed me the importance of that rolling boil and the magic of exact timing.
Years later, these cookies became my go-to recipe for busy weeknight desserts when my own children needed something sweet but I didn’t have time for traditional baking. There’s something deeply satisfying about creating something so delicious with such simple ingredients and minimal time investment. Every time I make them, I’m transported back to that kitchen with my grandmother, learning that sometimes the most memorable recipes are also the most straightforward ones.
Nutritional Considerations
Each Vintage Peanut Butter No Bake Cookie contains approximately 180 calories and provides protein from the peanut butter and fiber from the oats. While they’re certainly a treat, they also offer more nutritional value than many traditional cookies due to the whole grain oats and protein-rich peanut butter.
For those with dietary restrictions, this recipe can be adapted:
- Gluten-free: Ensure your oats are certified gluten-free
- Dairy-free: Substitute coconut oil for butter and use plant-based milk
- Reduced sugar: You can reduce the sugar by up to ¼ cup, though this may affect the setting properties
The Science Behind No-Bake Success
Understanding why Vintage Peanut Butter No Bake Cookies work helps ensure consistent results. The sugar and milk mixture creates a candy-like syrup when boiled. This syrup, when combined with the fats in peanut butter and butter, creates a binding agent that holds the oats together as it cools and hardens.
The 90-second boiling time is crucial because it allows enough water to evaporate from the mixture, concentrating the sugars to the proper consistency. Too little boiling leaves too much moisture, preventing proper setting. Too much boiling removes too much moisture, creating a hard, brittle texture.
Tips for Perfect Results Every Time
- Use a timer: Don’t guess at the 90-second boiling time. Use a timer for accuracy.
- Choose the right day: Avoid making these cookies on very humid days, as moisture in the air can prevent proper setting.
- Prep everything first: Have your wax paper laid out and ingredients measured before you start cooking.
- Stir constantly: Never stop stirring during the cooking process to prevent burning.
- Work quickly: Once you remove the mixture from heat, work efficiently to get the cookies dropped before the mixture starts to set in the pan.
Frequently Asked Questions About Vintage Peanut Butter No Bake Cookies
Can I use natural peanut butter instead of commercial brands?
While you can use natural peanut butter, it may affect the texture and setting properties of your cookies. Natural peanut butter often has oil separation and different consistency, which can make the cookies softer and less stable. If you prefer natural peanut butter, make sure it’s well-stirred and at room temperature before using.
Why did my cookies turn out crumbly instead of chewy?
Crumbly cookies usually result from overcooking the sugar mixture. The boiling time should be exactly 90 seconds at a full rolling boil. Longer cooking time removes too much moisture, creating a harder, more brittle texture. Also, make sure you’re measuring ingredients accurately – too much oats relative to the liquid mixture can cause crumbling.
Can I make these cookies ahead of time for a party?
Absolutely! Vintage Peanut Butter No Bake Cookies actually improve in flavor after sitting for a day. Make them up to three days ahead and store in an airtight container. They’re perfect for parties because they hold their shape well and don’t require last-minute preparation.
What’s the best way to get uniform cookie sizes?
Using a cookie scoop ensures consistent portion sizes and professional-looking results. A #40 scoop (about 1.5 tablespoons) works perfectly for these cookies. If you don’t have a cookie scoop, use a large spoon and try to keep portions consistent for even appearance.
My cookies seem too sweet. Can I reduce the sugar?
The sugar in this recipe isn’t just for sweetness – it’s crucial for the cookies’ structure and setting properties. Reducing sugar significantly will affect how well the cookies hold together. If you find them too sweet, try adding an extra pinch of salt to balance the flavors rather than reducing sugar.
Can I double this recipe for a large batch?
Yes, but use caution when doubling. Use a larger, heavy-bottomed saucepan and extend the boiling time slightly to account for the larger volume. You may need to boil for 2-2.5 minutes instead of 90 seconds. Watch for visual cues – the mixture should be glossy and slightly thickened.
How do I know if I’ve boiled the mixture long enough?
The mixture should reach a full rolling boil where large bubbles form rapidly and don’t stop when you stir. After 90 seconds of this rolling boil, test by dropping a small amount into cold water – it should form a soft ball that holds together but is still pliable. This is similar to the soft-ball stage in candy making.
Why do my cookies look dull instead of shiny?
Shiny cookies indicate proper cooking and technique. Dull cookies often result from the mixture cooling too much before the oats are added, or from not achieving a proper rolling boil. Work quickly once you remove the mixture from heat, and make sure you’re reaching the full rolling boil stage.
Creative Serving Ideas
Vintage Peanut Butter No Bake Cookies are delicious on their own, but they can also be incorporated into other desserts:
- Ice cream sandwiches: Press slightly warm cookies around vanilla ice cream for a nostalgic treat
- Cookie crumbles: Break up cookies to sprinkle over puddings or yogurt
- Gift giving: Package in decorative tins for thoughtful homemade gifts
- Party platters: Arrange on platters with other no-bake treats for dessert tables
Conclusion
Vintage Peanut Butter No Bake Cookies represent the best of American home baking – simple ingredients transformed into something extraordinary through technique and tradition. These timeless treats prove that you don’t need complicated recipes or hours in the kitchen to create memorable desserts that bring people together.
Whether you’re introducing a new generation to this classic recipe or revisiting a childhood favorite, these cookies deliver consistent results and pure satisfaction. The combination of creamy peanut butter, chewy oats, and that distinctive no-bake texture creates a cookie experience that’s both nostalgic and completely satisfying.
Don’t let another day pass without trying these incredible Vintage Peanut Butter No Bake Cookies! They’re waiting to become your new go-to recipe for quick, delicious homemade treats. Once you master this classic technique, you’ll understand why this recipe has remained unchanged and beloved for over six decades.
Ready to explore more vintage recipes? Check out our collection of retro desserts that celebrate the timeless appeal of classic American baking – each one tested and perfected to bring those cherished flavors right to your modern kitchen!